06. March, 2020 •
TIPS & TRICKS •
MOUNTAIN BIKING
Posted by Sarah Schwarz
06. March, 2020 •
TIPS & TRICKS •
MOUNTAIN BIKING
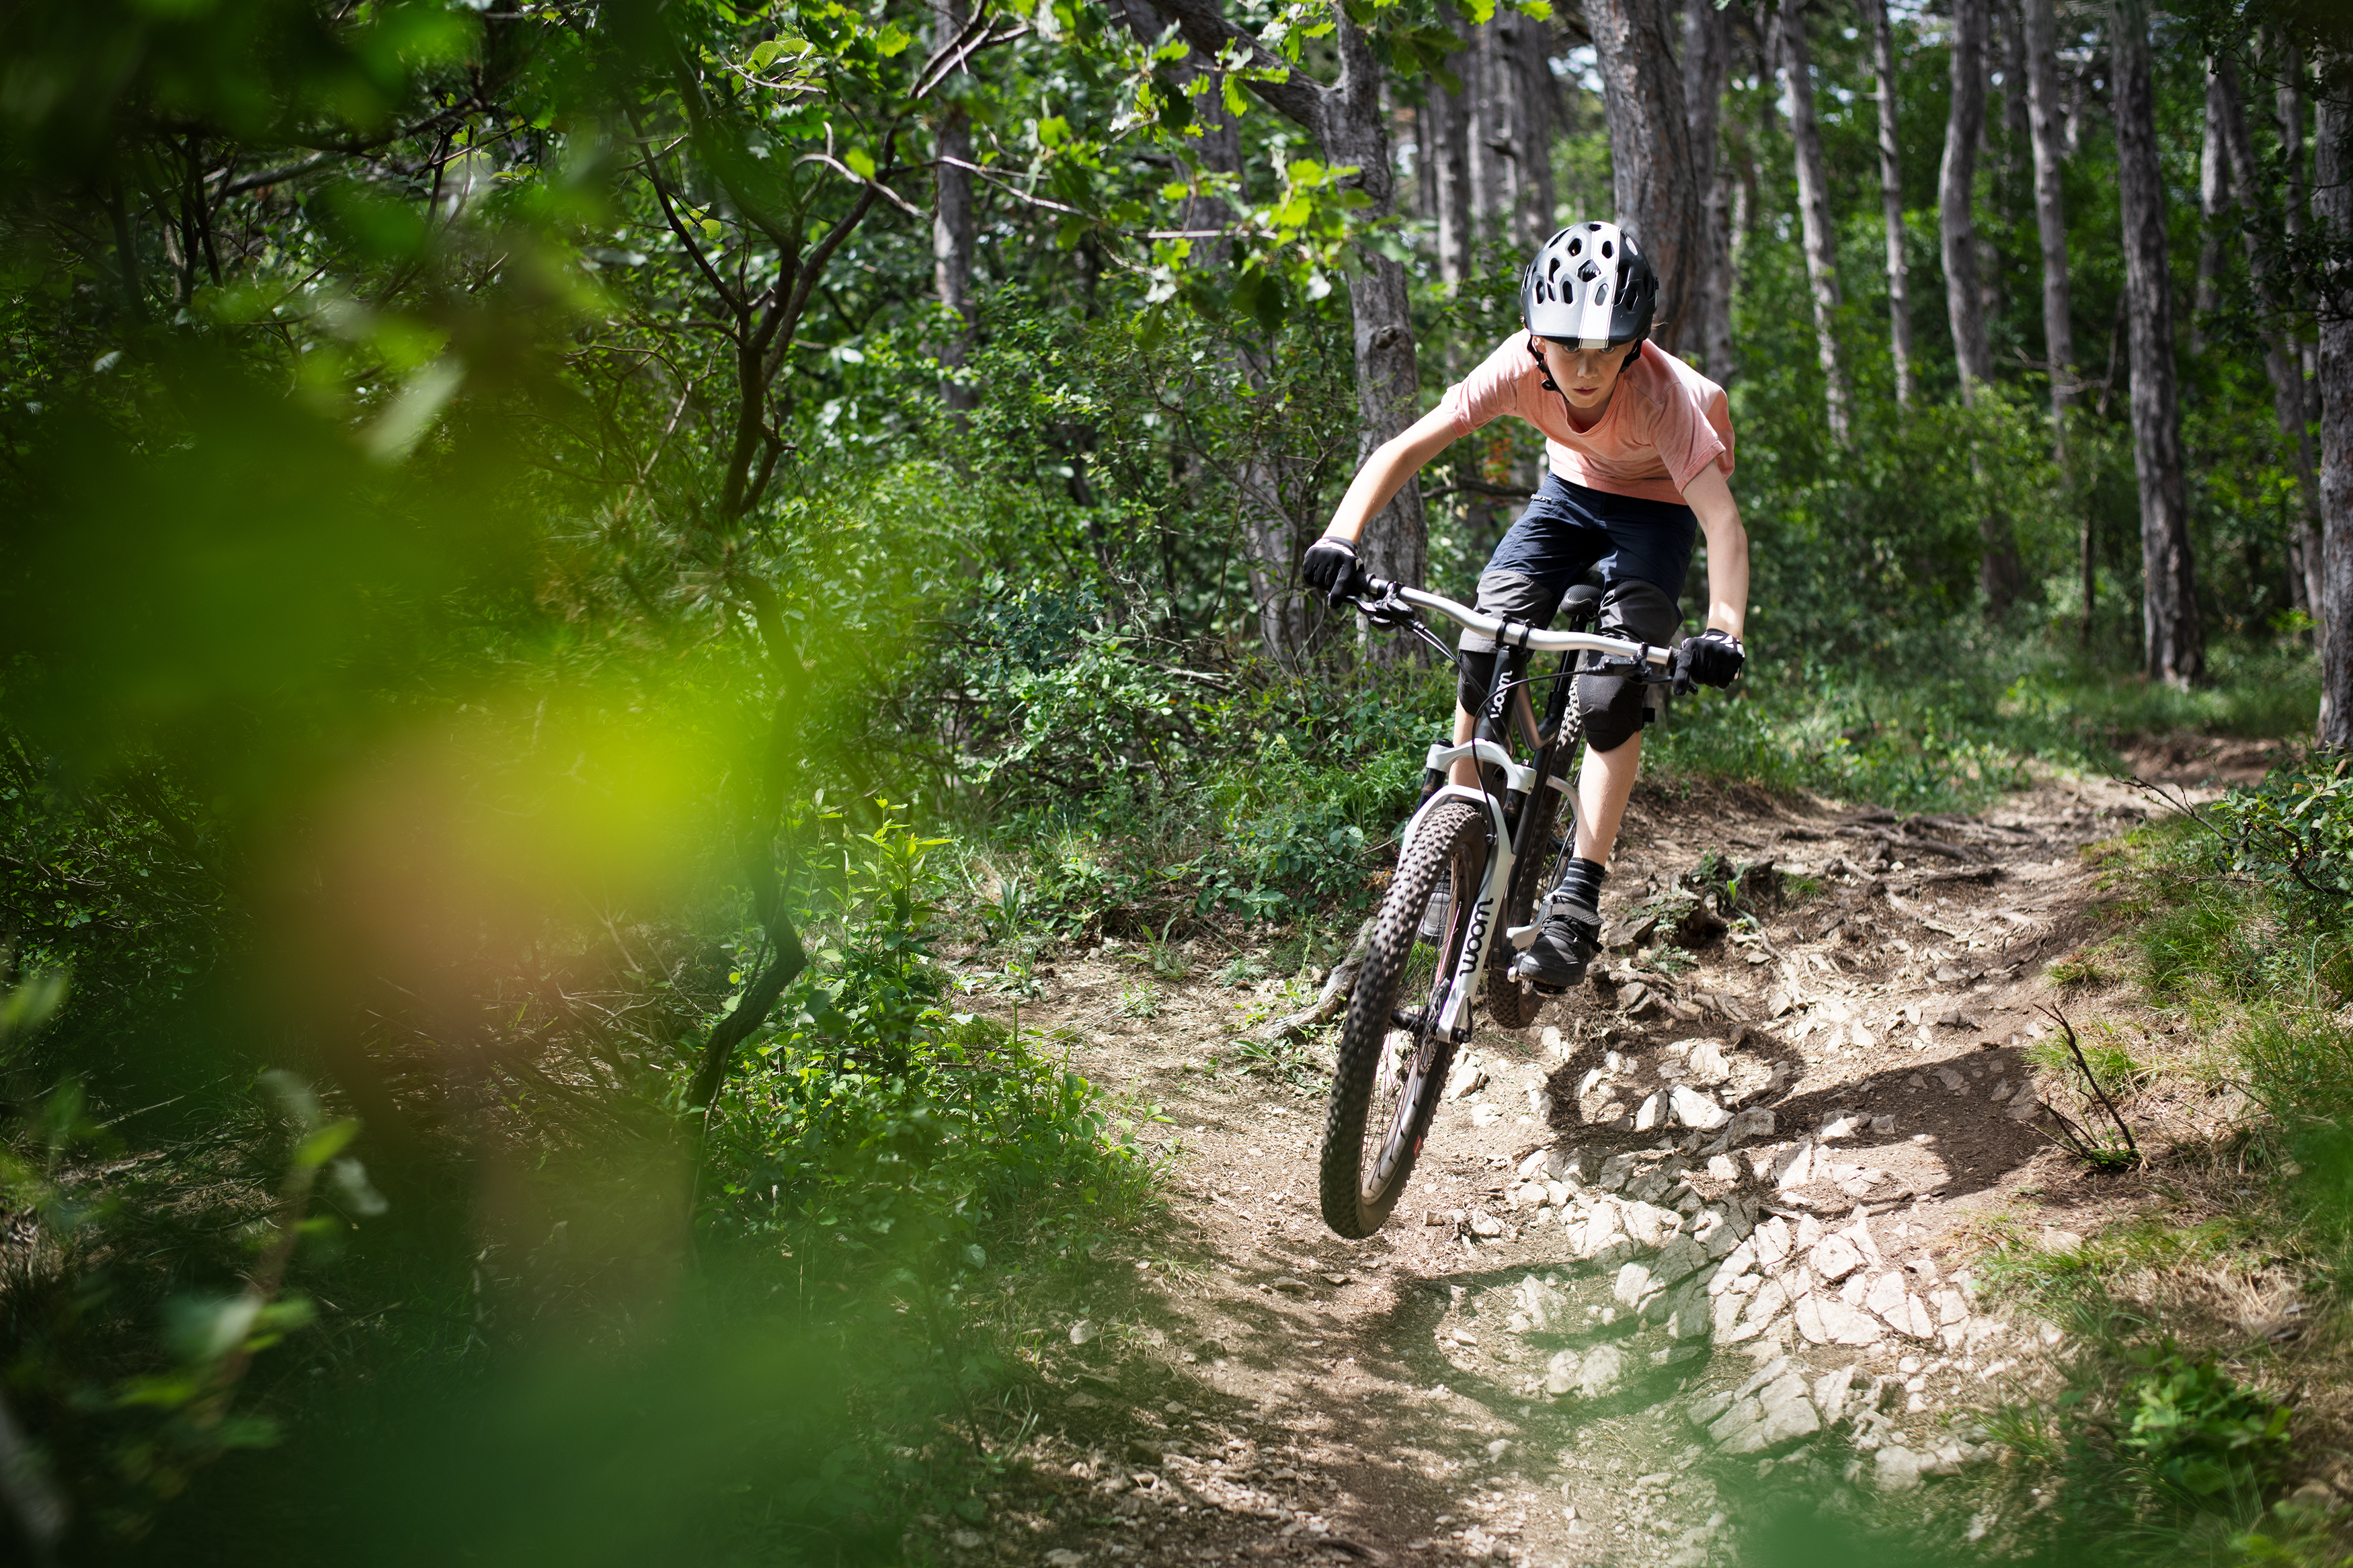
The great outdoors is one giant playground for mountain bikers. So that you and your kids can make the most of it, your offspring should first get acquainted with certain obstacles and tune up the necessary skills. Everyone has to begin somewhere. Imagine if their first experience was on an eye-wateringly tough trail? It probably would not be much fun.
When it comes to learning the basics, bike parks are becoming increasingly popular. Once the exclusive terrain of big air-seekers, bike parks have now taken on a more democratic approach with beginner-friendly trails too. Much more mellow and not so rough, these throw up lots of little obstacles along the way. Here’s where your child can get their first taste for thrilling downhills in a playful way. It won’t just lead to shared jubilation on the trail, but big grins too.Take some notes from our Bike Park ABC and know what to expect:
- Lines: This is the common term for trails in a bike park. They are categorised based on difficulty, and there’s a line for all skill levels.
- Berms: These are banked corners that are higher on the outside edge than the inside. Berms can be found on all good MTB trails – either formed with a dirt wall, or as a man-made wooden wall ride. The steepness of the turn varies from berm to berm.
- Tabletop: Nothing more than a flattened-off mound of dirt. This sort of jump is made of three parts: the launch ramp, the landing ramp, and a flat mid-section that links them. Seen from the side, it looks like a trapeze. If your kid is keen to learn how to jump, starting with tabletops is a good idea as the flat top allows a lot of room for error. What’s more, tabletops can always be rolled over.
- Rollers: Big, smoothly rounded lumps of dirt along the trail, which children can roll over or jump.
- Double: A jump that consists of two separate parts – the take-off and the landing. There's a mandatory gap between them that has to be jumped. Once your kid can comfortably clear a tabletop, they are ready to try a double. It’s best to begin with a small one. This sort of jump is called a 'double'.
- Drop: A ledge, lip, or step, that’s too high for your kid to simply roll over. Drops needs to be taken like a jump – people talk about ‘doing drops'. Alongside technique and timing, you have to approach a drop with commitment. As always, start small. Pavement kerbs are an ideal spot for pre-drop training.
- Kicker: A standalone jump designed for advanced riders looking for some airtime.
- Step up: From the take-off ramp, your kid jumps up to a higher landing. These tend to be relatively small and low-risk as your kid won’t have a long way to fall if things go wrong.
- Step down: While similar to a drop, these involve a more definite lip that your child has to pop off to a lower landing place. Basically they have to jump slightly up, before they come down.
- Gap: A mandatory gap in the ground that can’t be rolled through, so therefore needs to be covered by a jump. On particularly challenging gaps, there’s usually an option to take the easier, so-called Chicken Line, or B-line.
- Airbag jump: These are huge airbags that have been specially designed for jumps and they provide a real adrenaline kick for everyone. Air bags offer limited risk for beginners and provide a gentle landing for your child's early attempts at jumping. Airbags are also ideal for advanced riders to perfect new tricks with limited risk of injury. The cushion has enough support so that you can just keep riding if you land on two wheels.
- North Shore: Wooden trails, like planks, bridges or ramps, that are built above the ground. These tend not to be any wider than 50 centimetres. They take their name from Canada’s North Shore region, where they were originally conceived as a way to get across impassable forest floors.
- Pump track: These are specially made, predominantly flat tracks with lots of little rollers and berms. They’re made of wood, tarmac, dirt, or plastic. The aim is to complete the track without pedalling. This is where the name comes from; the technique is known as pumping. Kids use force to propel themselves forwards, alternatively bending and straightening their arms and legs–pushing and pulling over the rollers. It’s quite a strenuous movement, but it’s also incredibly fun. It’s a great skill to develop ahead of going off-road as your kid will learn how to smoothly overcome obstacles without pedalling, as well as how to gain free speed around corners and over rollers.
- Dirt jump parks: Short lines that consist of consecutive jumps, known as dirt jumps Advanced riders will be looking for super steep kickers that launch them into the air so they can pull off tricks.
Safety is naturally paramount when it comes to bike parks so always make sure your child’s bike is in good working order before your visit. Not just a sensible option, protective gear is often required at bike parks. Before your visit, find out what your child may need.
And the bike: those visiting bike parks regularly will know that a mountain bike with a suspension fork and disc brakes is not only more capable and safer, but also much more fun.
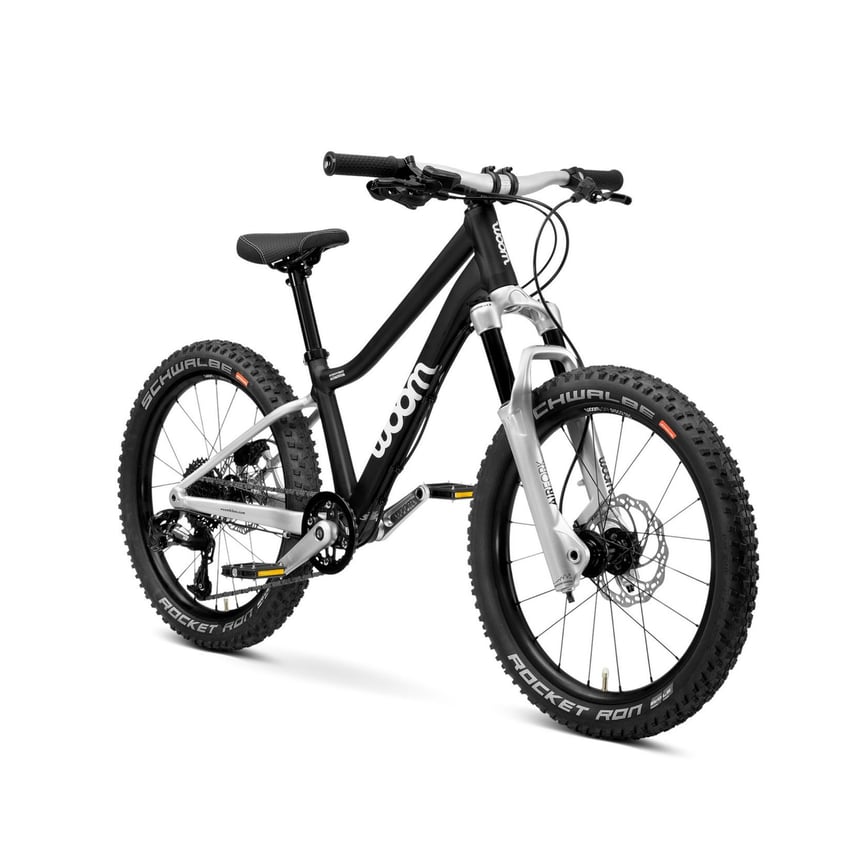
Our new OFF Air is the ultimate rig on which your child can tackle lines of varying difficulty.
When it comes to choosing a bike park, check what sort of trails are on offer in terms of difficulty so that the whole family will enjoy the visit. Many bike parks are renowned for being family-friendly. These bike parks might be worth considering:
- Bikepark Serfaus-Fiss-Ladis (Austria): https://www.bike-sfl.at/en
- Châtel Mountain Bike Park (France): https://www.chatelactivites.com/en/ete/trails/
- Bike Park Mottolino (Italy): https://www.mottolino.com/en/summer/bikepark/
- Lenzerheide Bike Park (Switzerland): https://www.bikekingdom.ch/en

.jpg?width=926&upsize=true&name=woom_still_and_moving_in_action_2018_345-Edit-720x480-32ef3212-c95f-4d63-b83a-d57bf7c038f6%20(1).jpg)
